Saddle Stitch Binding
|
Saddle Stitch Binding is a simple book making technique that can be used to create pamphlets and booklets. You can also use this method to make thicker books containing many signatures of paper. The technique involves stitching stacks of folded paper into a cover. You only need a few supplies which you may already have in your home. |
 |
Supplies
|
 |
Instructions
My images and first set of instructions are for a small booklet with 3 holes in the spine. At the bottom of this page I give you the sewing instructions for a 5 hole booklet.
1. Cut your covers and inside pages to the size you want. The inside pages should be slightly smaller than your covers. Score and fold the cover and pages in half.
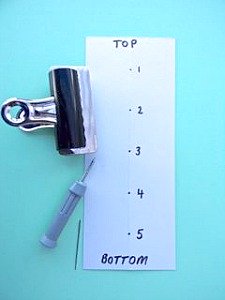
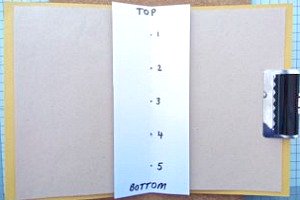
2. Make a hole punching template (shown above). Cut a piece of card approx. 3" wide and the same height as your book cover (though in my photo below I have used a template longer than my spine). Fold it in half lengthways, then measure and mark on it where you want your holes to be.
You can manage without a template for a small 3 hole booklet but it is useful for larger booklets and when you are making a book with more than 1 signature (set of pages).
|
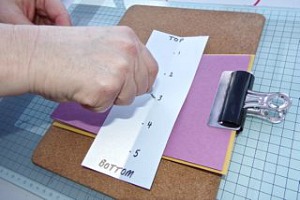
3. Make the holes in the book's spine. I am using a cork board to work on. You can also put the spine of your book into the spine of a phone directory and work in there. Use clips to hold the cover and pages together. This is a really thin booklet so the holes in the cover and pages can be made at the same time. With a thicker book you will have to do the pages in batches. |
 |
4. Take your needle and thread and start to sew from the inside, through the middle hole. Leave a tail of thread approx. 3-4" long on the inside don't pull it through as you sew.
5. Sew back in through the top hole and then out again through the bottom hole. On the outside sew back in through the middle hole. Gently pull the binding taut and tie a double knot on the inside to finish off.
You can start you sewing off from the outside and finish on the outside. I do this a lot as I like to leave threads trailing on the spines of my books.
5 Hole Saddle Stitch Binding
It helps to use your template (with the top and bottom marked, and numbered 1 - 5 as on my template) as a guide.
 |
From the inside go out through 3, leaving a tail of thread inside. Go back in through 2 and back out through 1. Go back in again through 2 and out through 4, in through 5, out through 4 and back in through 3. Tie off your binding with a double knot. |
Binding More Than 1 Signature
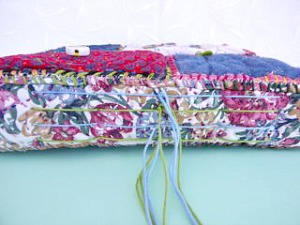
You can use saddle stitch binding to sew more than one signature into a book as I have done with this fabric covered journal.
 |
I mark the inside of the spine with lines where I want to sew my signatures. Then I place my hole template on the lines, one at a time, and make the holes for sewing through. I put my cover on a surface with the spine facing me and sew in the bottom signature first and then the other signatures, working up from the bottom. |
Saddle Stitch Binding > Handmade Books > The PaperCraft Room