Paper Bag Album
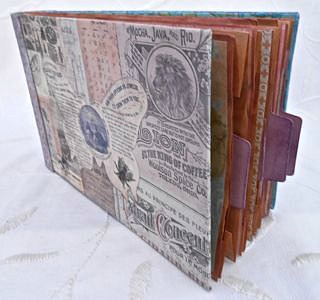
A paper bag album is easy to make and fun to use - decorate it however you choose. The pockets make great places to put photo mats, tickets, paper souvenirs, ephemera and treasures.
|
This album can be made with any size of bag - the bag I am using is a lunch bag size and gives me a finished page that is 7 x 4 1/2". Use any bags you have available or find bags for the size of project you would like to make. |
 |
Materials
- 8 paper bags
- 2 pieces chipboard/ thick card for the covers
- Adhesive - a strong wet glue is best for assembling your pages (I show double sided tape on my instructions just so it is easy to see where to apply the glue). I use double sided tape and a glue stick to adhere paper onto my pages.
- Papers, paint, embellishments etc. - to decorate the album.
|
Instructions This first instruction will vary depending on the bag you are using. My bags don't have a block bottom so I score 2 1/2" from the base, fold the flap and glue it down. |
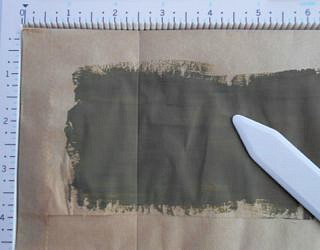 |
If your bag has a block bottom just fold the bottom over, there is a little flap in the block bottom, just where you fold the bag, it is a good idea to glue that flap down.
|
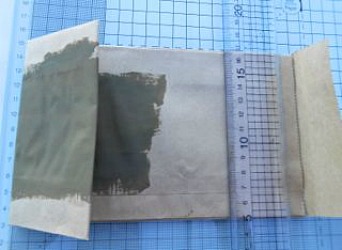
With your flap folded over, measure from the left hand side and trim all your bags to the same size. My album pages are 7" long. |
 |
|
Take 2 of the bags and apply glue on the outside of the flap as shown here. I am using tape so that you can see clearly where to glue, but I recommend a strong wet glue or the stronger red double sided tape. |
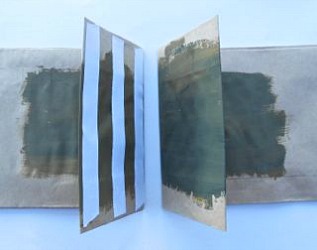 |
Stick the two flaps together. Repeat this step two more times so you have three sets of two bags glued together and two unglued bags.
|
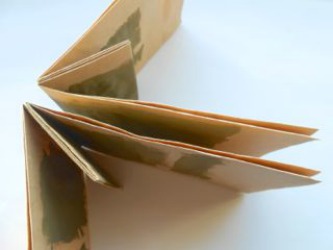
Take two of your sets of bags and place them long sides together as shown. Apply glue on one of the long flaps and stick the long flaps together. Take the third set of bags and glue one of the long flaps to another long flap, so your three sets are attached together. |
 |
|
Now glue your front and back pages on, long sides together again, in the position shown here. |
 |
I allow my glue to dry and then decorate my pages at this stage. I applied distress ink to the edges, gussets and just inside the flaps. I then stuck on my papers to the pages and flaps. You don't need to put paper on the outside of the small front and back flap as the cover is glued to them. Decorate and embellish your paper bag album however you want.
Make Your Covers
Measure and cut your chipboard to the size of your pages - 7 x 4 1/2" in my example.
|
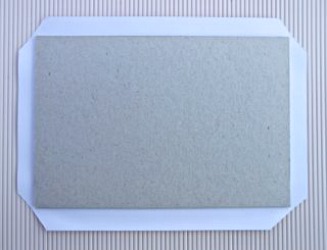
Glue the chipboard to the front cover paper, leaving approximately a half inch border of paper. Cut off the corners of the paper but not quite up to the chipboard. Fold the paper over the chipboard and glue in place on the reverse of the cover. |
 |
For the inside of the cover cut a piece of paper just a tiny bit smaller than the size of the chipboard and stick it down on the inside of the cover.
Repeat for the back cover.
|
Apply glue to the small flap at the front of the album and and carefully line up your front cover onto the flap and stick it down. Repeat for the back cover. I do put a couple of heavy books flat on my album as it is drying to hold everything together. |
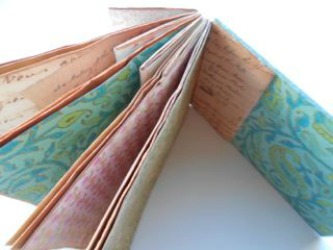 Attaching the back cover. |
Spine Cover
The spine is attractive when left uncovered but I have made a spine cover on my album. Take a piece of thick but fairly flexible card. Cut the card into a rectangle that is the height of your cover by 2" in my example. Again I can't be precise with the measurement as you might need a thicker or thinner piece depending on the size of your paper bag album.
|
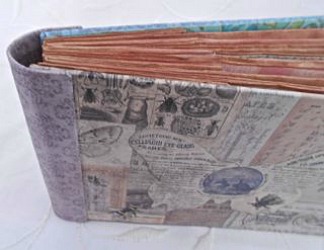
I covered both sides of the spine in paper using the same method I used for sticking papers to the covers. Then using strong glue apply the spine to the front cover. Apply pressure and let the glue dry before sticking the spine to the back of your album and again apply pressure as the glue dries. |
 |
Your paper bag album is now ready to use.
Paper Bag Album > Handmade Books > The PaperCraft Room